
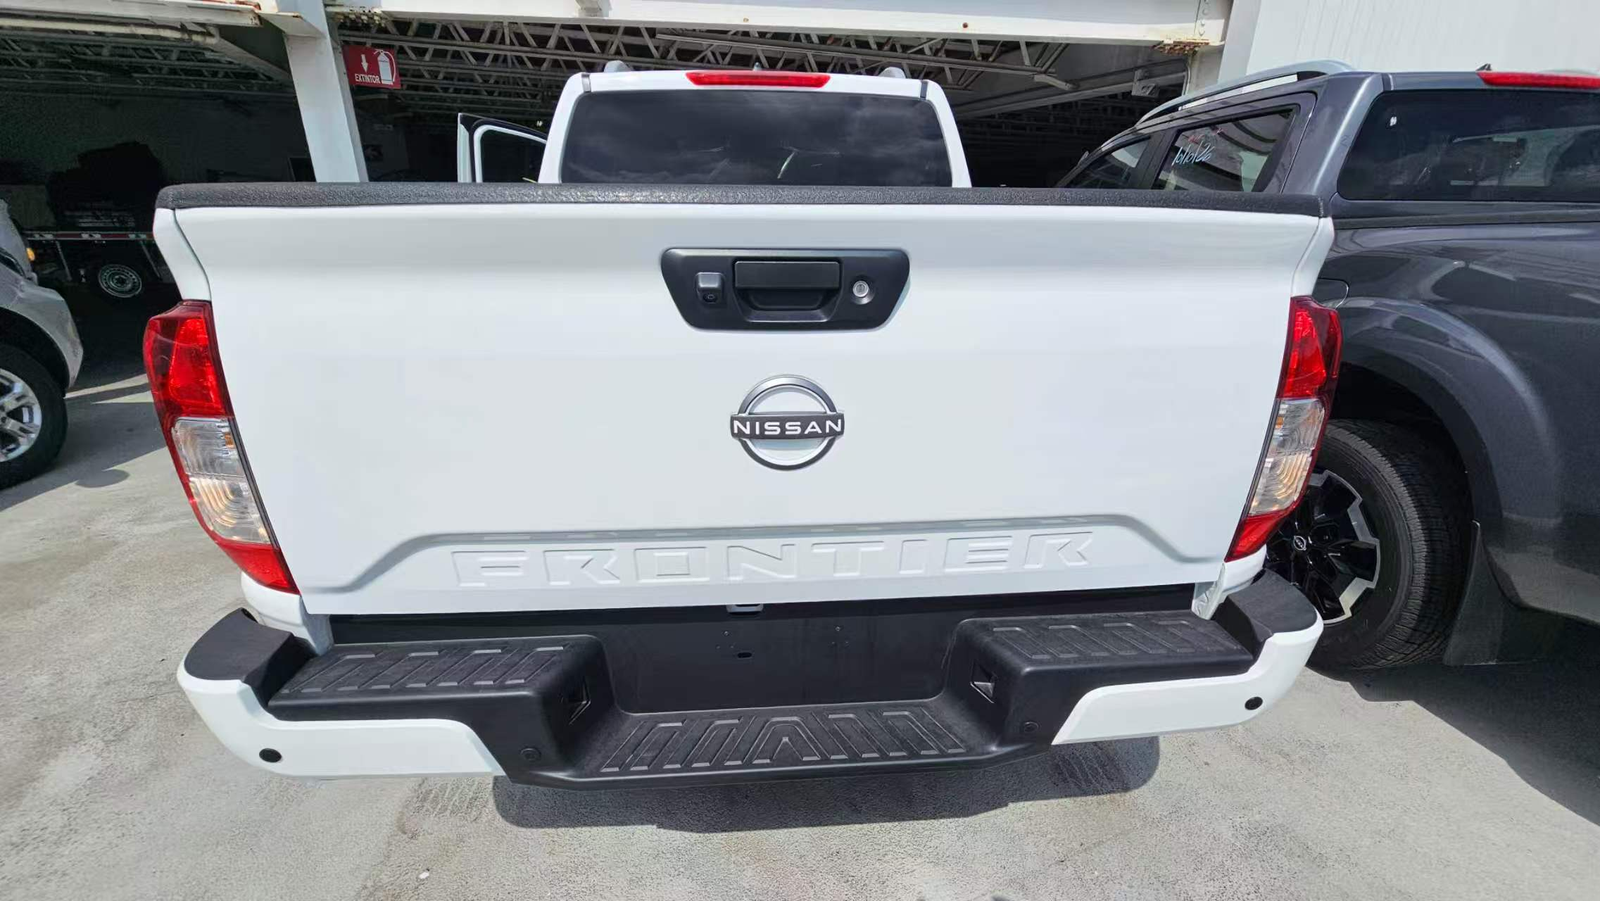
To choose the right mounting spot for a pickup truck backup camera, define the viewing priority first: bumper corners, the reversing path or the trailer hitch zone. Before drilling holes or tightening fasteners, check the camera angle with the tailgate both up and down, allow movement at the harness, and match the camera to the in-cab display.
On this page
Key Takeaways
- A tailgate-mounted camera changes its aim when the tailgate opens.
- Measure the full cable route before ordering an extension harness.
- Identify camera power, video and the reverse trigger separately.
Where Should You Mount the Camera?
The mounting location depends on the viewing task rather than cosmetic symmetry. A wide-angle specification alone does not guarantee coverage of both bumper edges and the hitch ball. Mounting height and tilt depend on the truck body and the view required.
| Candidate location | Mounting and viewing considerations |
|---|---|
| Tailgate handle area | Check space behind the bezel or panel and whether the structure supports the mount. The camera moves with the tailgate, so test both open and closed positions. |
| License plate or bumper | Check obstruction from steps, receiver hitches and the lowered tailgate. Review road spray, mud and possible loading contact. |
| Other fixed body locations | Check the view from a suitable fixed bracket or panel without obstructing lights, latches or cargo handling. A high view into the bed serves a different task from a low rear view. |
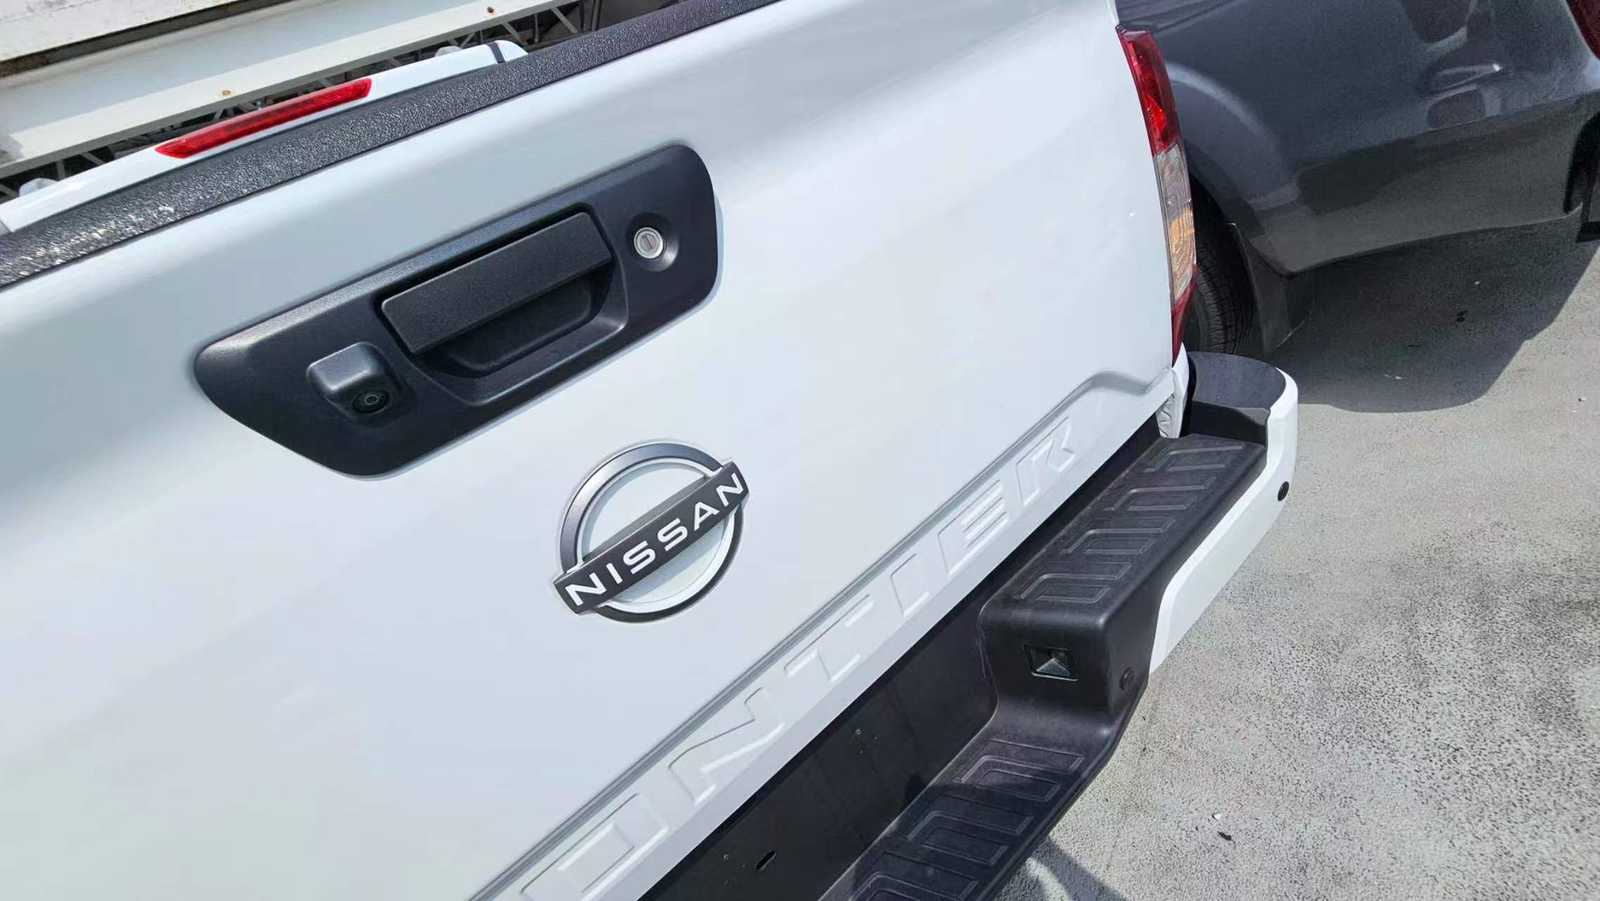
Camera placement beside the tailgate handle of a Nissan pickup.
The pickup truck camera page brings together rear, side and cab display options for configuration planning. Each option still needs vehicle-level fitment checks.
What Changes When the Tailgate Opens?
When a camera is attached to the tailgate handle or bezel, its viewing direction changes as the gate moves. A view set with the tailgate closed may become unsuitable when it is lowered. A bumper-mounted camera can also be obscured by the open gate.
Test the proposed position under three operating conditions:
- Tailgate closed: Check the required bumper corners, hitch zone or reversing path. Do not assume one position covers all three.
- Tailgate lowered: Check whether the gate blocks a fixed lens or changes the direction of a tailgate-mounted lens.
- Loaded bed: Check whether the usual cargo, toolboxes or utility racks obstruct the intended view.
For trucks with removable tailgates, review the harness near the hinges and the disconnection procedure. If a disconnect is needed, select a connector suitable for the camera, cable and exposure, and place it where the tailgate can be removed without cutting wires or pulling the harness. Where one position cannot meet separate reversing, hitch-alignment and bed-monitoring tasks, consider an additional camera rather than widening the claim for a single lens.
Running the Cable to the Cab
Measure the full path before ordering extension harnesses, accounting for bends, service access and relative movement between vehicle parts. A camera housing's ingress protection rating does not guarantee the sealing of its cable connections.
- Measure the full path. Trace the proposed route from the rear mounting point to the display, including crossmembers, bends and suitable service loops. Check the cable length supported by the selected system.
- Protect against pinch points. Inspect tailgate hinges, latches and folding covers through their full movement. Keep wiring outside their travel and prevent slack from entering moving hardware.
- Protect the chassis run. Use the vehicle's approved routing and suitable supports and protective loom. Keep the harness clear of exhaust heat, sharp edges, suspension and driveline movement. Avoid overtightening supports against the cable.
- Check cab entry. Inspect an approved existing pass-through where practical. Confirm the connector can pass without damaging existing wiring or the seal; do not cut an occupied grommet without checking both sides and the vehicle instructions.
- Keep connectors serviceable. Position connections away from direct splash where practical, seal them as specified for the chosen components and support them against vibration. Keep them accessible for inspection.
Rear View Safety's wiring reference separates power, input selection, video compatibility and trigger checks for its systems. Use the wiring diagram for the exact camera and display being installed rather than copying another product's wire colours.
Separate Monitor or Factory Screen?
Choose the display path before purchasing cameras and harnesses.
- Dedicated monitor: Check the accepted video format and resolution, operating voltage and connector pinout. Review mounting space and readability without blocking the road view, controls or airbags.
- Factory screen: Check the vehicle make, model year and head-unit version. A compatible interface or feature activation may be needed; a factory screen does not automatically accept an aftermarket camera input. Crutchfield's vehicle-specific camera guide illustrates how camera and display integration varies across particular truck configurations.
Distinguish camera power, video and reverse-trigger functions in the system diagram. Matching connector shapes do not guarantee matching pin assignments or video formats. The existing 4-pin and RCA connection guide explains these checks in more detail. Verify the selected configuration before powering it up.
Check the View Before Final Installation
With the vehicle secured and people clear of moving panels, test the view before final fastening and sealing:
- Target coverage: Verify that the required reversing path, bumper corners or hitch area is visible on the intended display.
- Obstructions: Check the effect of the step bumper, hitch equipment and normal cargo.
- Tailgate movement: Open and close the tailgate through its travel, observing the image and checking for cable tension or trapped slack.
- Signal and switching: Check mirror or normal orientation, picture stability and reverse switching if it is part of the selected configuration.
- Service access: Inspect supports, connector security and cab-entry seals, including access for future maintenance.
For a pickup fleet or custom build, share your vehicle make, model year, tailgate photos and display requirements. These details provide a starting point for reviewing a suitable camera and harness configuration.
Frequently Asked Questions
Where is the best place to mount a backup camera on a pickup truck?
There is no universal position. Compare tailgate-handle, license-plate, bumper and other suitable fixed mounts against the view needed. Check bodywork, tailgate movement, cargo and hitch obstruction before committing to a location.
Will the camera still work with the tailgate down?
It depends on the mounting position and wiring. A tailgate-mounted camera changes direction as the gate moves, while the lowered gate may obstruct a fixed camera. Check the actual image and harness movement in both positions rather than assuming the closed-tailgate view remains available.
Can an aftermarket camera use the factory screen?
Some vehicle and head-unit configurations allow it with a compatible interface or feature activation. Check the exact make, model year, radio version, camera output and any required adapter before ordering. Otherwise, consider a separately matched display.
How much camera cable do I need?
Measure the actual route from the camera to the display, including bends, panel transitions, movement allowance and service access. Then check the available harness lengths and supported cable run for the selected system. Vehicle length alone is not a reliable cable-length estimate.